Customer Entry |
|

Customer Entry is divided into five steps to take you through the process to record new or existing customer and site details. Also see Related Tasks .
Navigate To: Customers>Customer Entry
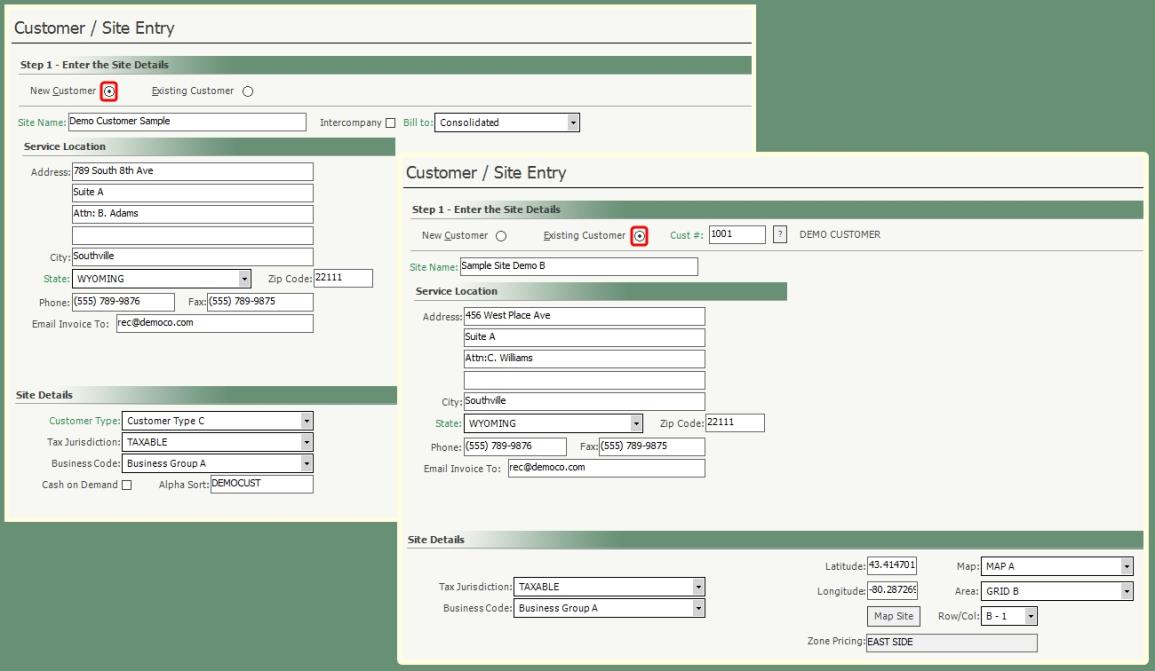
Step 1 - Enter Site Details
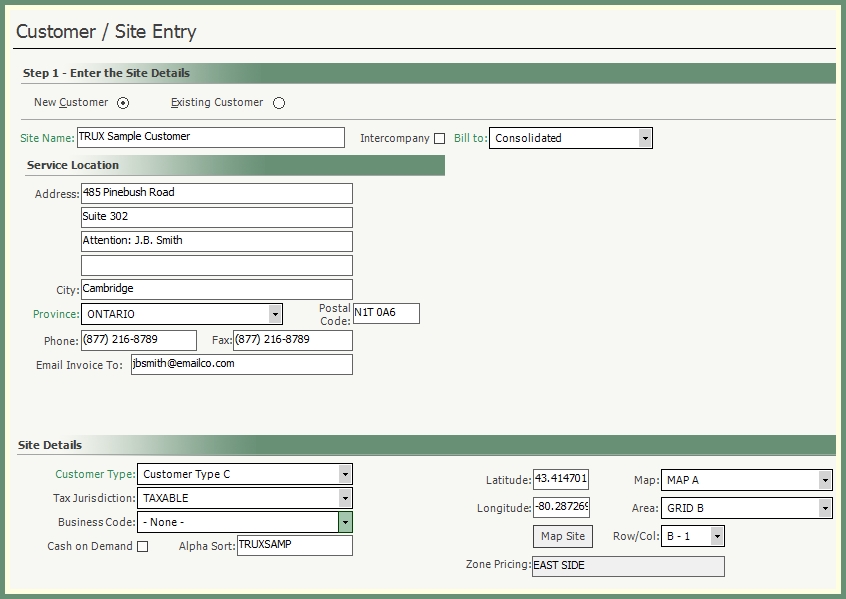
- New Customer will be selected as the default. Retain this selection for new customer entry.
- Select Existing Customer to add a new site to an Existing Customer.
- Enter or search the existing customer number to add the new site to.
- Populate Customer/Site Entry, Service Location and Site Details as per field titles.
- See: Step 1 - Customer/Site Entry Field Descriptions.
- Fields in green are required.
- Click Map Site to populate the Latitude and Longitude.
- Apply Map, Area and Row.
- Zones will populate if applicable.
- Click Next to proceed to Step 2.
Step 2 - Select a Price Class
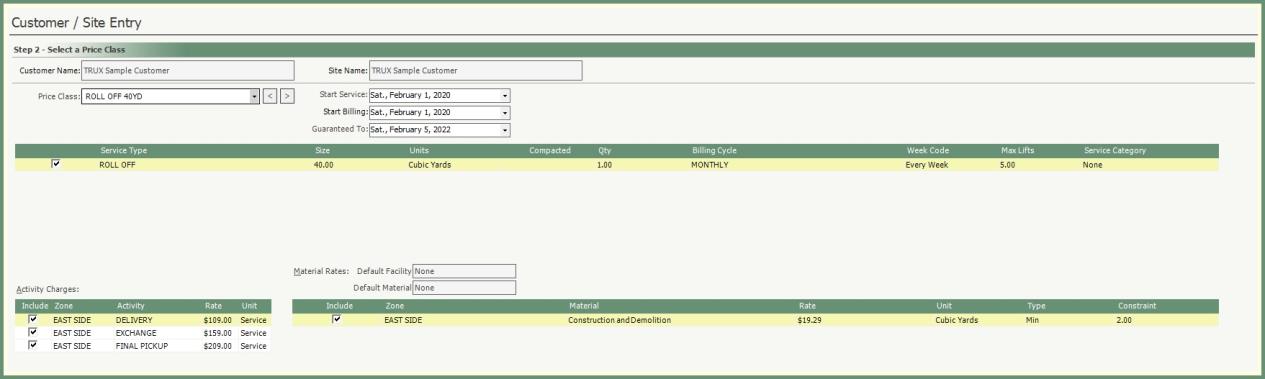
- Select a Price Class from the drop down. (Optional).
- If Zone Pricing is populated in Step 1, only the price classes associated with that zone will be available in the price class drop down.
- Verify Start Service, Start Billing and Guaranteed To dates. Update as needed.
- Select the applicable Service Type.
- Select the applicable Activity Charges.
- Apply Material Rates to be included.
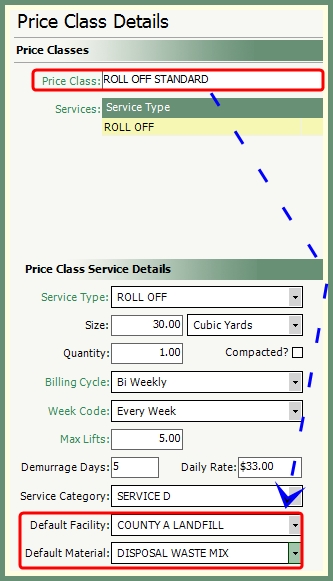
- Default Facility & Default Material will only populate if a respective default exists on the selected Price Class.
- Click Next to proceed to Step 3.
Step 3 - Define Additional Services

- Click Add New and select an additional service type.
- Existing service types in the grid can be removed.
- Define Service Details for the selected service type.
- See: Step 3 - Define Additional Services for field descriptions..
- Add applicable Activity Charges, Material Rates, Messages & Custom Fields in the defined grid/tabs.
- Click Save Changes.
- Click Next to proceed to Step 4.
Step 4 - Additional Site Information

- Populate Additional Site Information fields as applicable to this site.
- See Step 4 - Additional Site Information for field descriptions.
- Fields in green are required.
- Review existing Surcharge Exemptions. Update as needed.
- Click Next to proceed to Step 5.
Step 5 - Miscellaneous Details
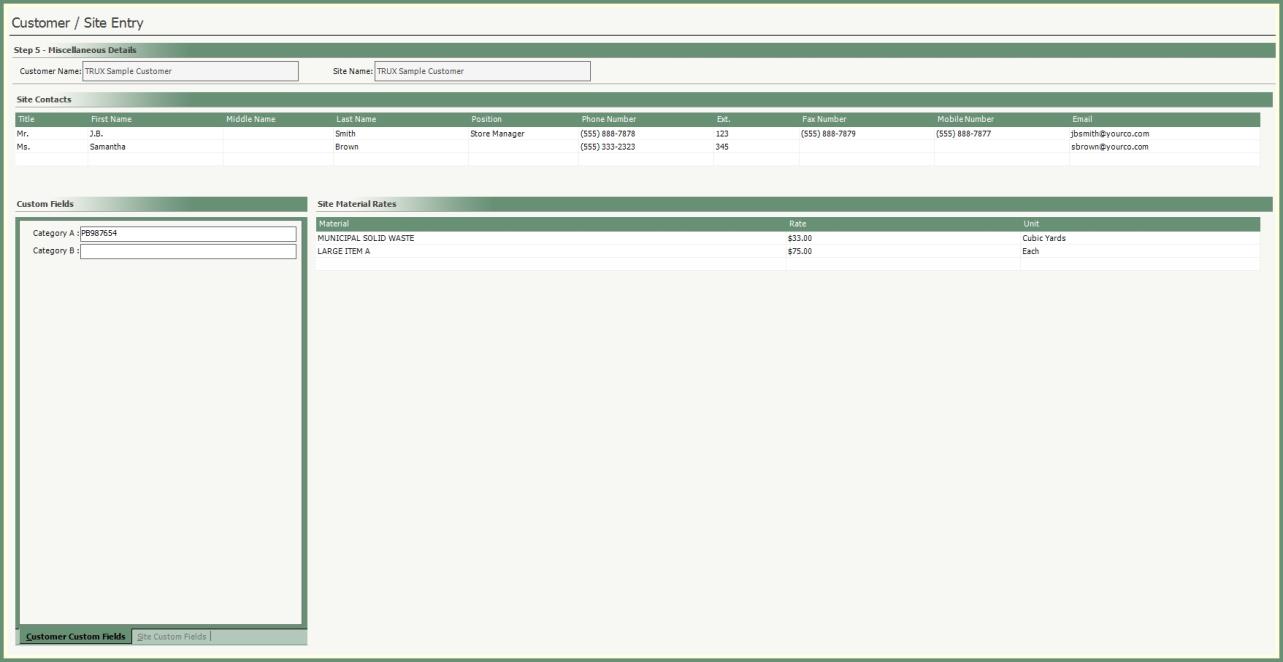
- Enter Site Contacts in the grid according to the column headers.
- Apply Customer Custom Fields if applicable.
- Apply Site Custom Fields if applicable.
- Define applicable Site Material Rates with materials, rates and units.
- Click Finish to proceed to Results of New Entry.
Finished - Results Of New Entry
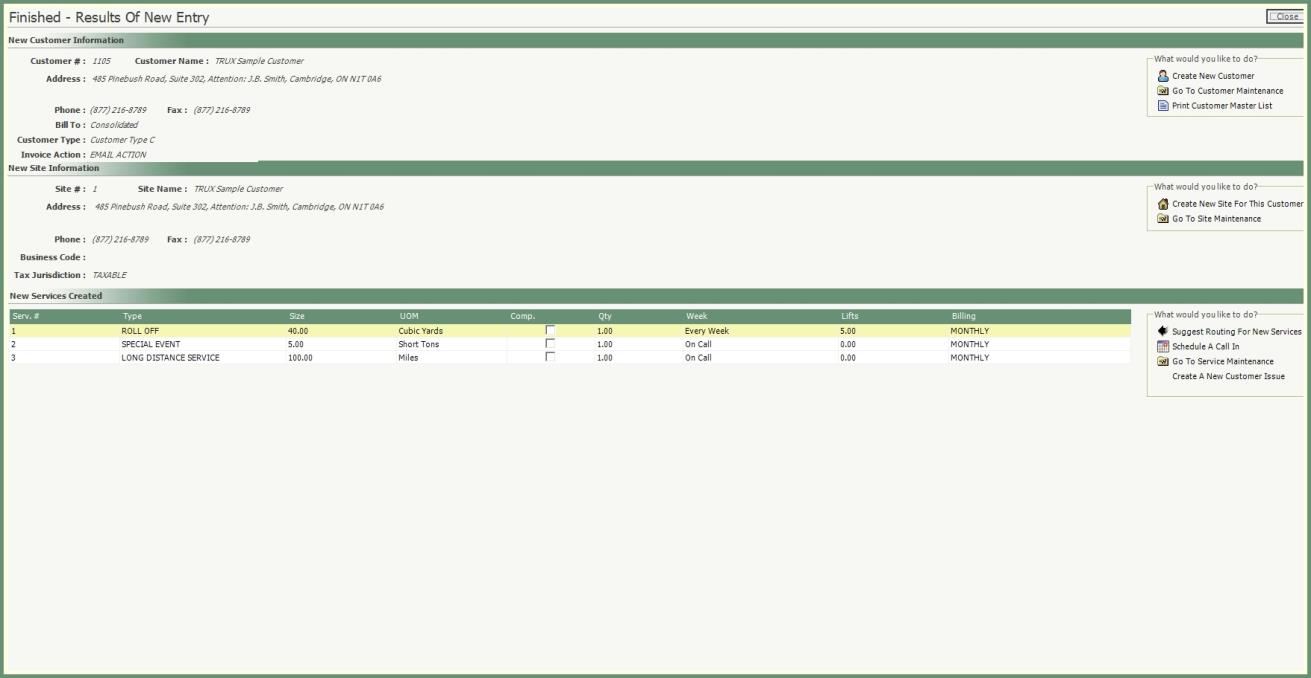
- New Customer, Site and Service details created in Steps 1-5 will populate the Finished Results Of New Entry.
- Each section will include a list of links to additional functions.
- To the right of each section, a list of links with additional functions within 'What would you like to do'? can be used to proceed to tasks such as Customer or Site Maintenance, Routing, Schedule a Call-In, etc...